How to Make Kombucha
Kombucha, the fizzy, tea-based probiotic drink filling the shelves of your favorite health food store is fun to make, and even better to drink! Brewing the fermented tea drink can be a bit fussy - but it’s well worth the work! Just follow this guide to start making your own kombucha.
About Kombucha
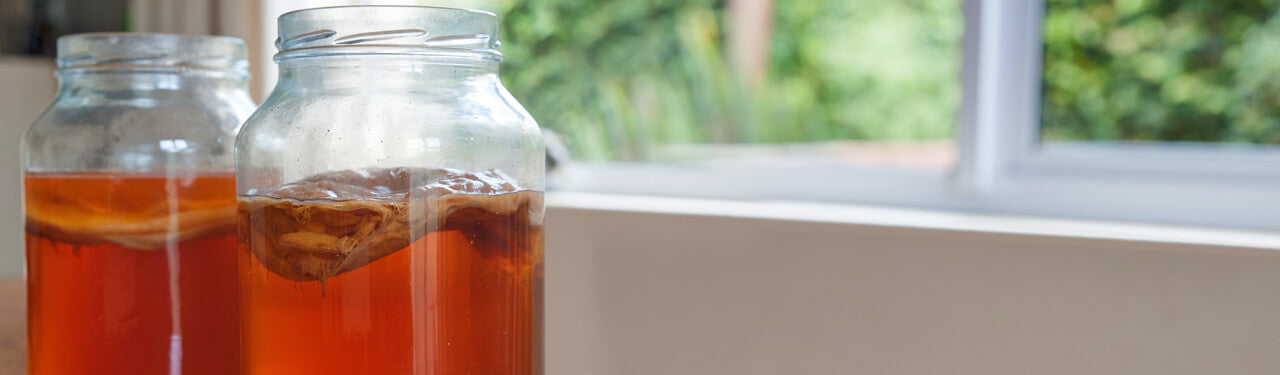
Kombucha (occasionally called Russian mushroom tea) is a highly sweetened probiotic tea fermented using a symbiotic colony of bacteria and yeast (or SCOBY). This kombucha “mushroom” is a pale, rubbery zoogleal mat of yeast and acetobacters. The yeast break the sugar’s sucrose into fructose and glucose, then converts the glucose into alcohol. The several species of acetobacter, in turn, convert this alcohol into acetic acid (i.e., vinegar) and gluconic acid. The gluconic acid smooths the finish of the acetic acid, suppressing much of the vinegar’s harshness. The result is a sweet, tangy, fizzy, lightly caffeinated probiotic beverage with almost no alcohol (generally less than .5 percent), and measurable amounts of L-theanine, an amino acid found in all brewed teas and shown to reduce mental and physical stress.
A wide array of health benefits have been attributed to kombucha. Gluconic acid, a principal product of the kombucha fermentation process, is thought to slow the progress of viral infections, dissolve gallstones, protect the digestive system, and help stave off yeast infections. Additionally, kombucha contains measurable amounts of glucaric acid. Some research has shown that glucaric acid increases the efficiency of the liver’s detoxification pathways. There is ongoing research into the use of glucaric acid to prevent breast, colon and prostate cancer.
Although none of these claims have been evaluated by the Food and Drug Administration or US Department of Agriculture (neither agency regularly evaluates the effectiveness of folk medicines or herbal remedies) both the FDA and Center for Disease Control have investigated all health concerns related to properly brewed kombucha tea, and found it to be perfectly safe.
Homemade kombucha contains live cultures and is very tart -- a little belly rumbling is not unusual at first. It’s a good idea to ease into drinking it regularly. Start with 2 ounces at a time for several days.
Kombucha Brewing Do's and Don'ts
Making kombucha involves careful preparation, and a lot of waiting around. But before you dive in, check out these tips to ensure that you have a successful brewing experience!
Kombucha Brewing Do's:
- Clean everything thoroughly before brewing or bottling.
- Filter or boil your water before brewing.
- Use refined white sugar; it is healthier for your SCOBY, and results in a more palatable tea with higher levels of the several healthful organic acids. The SCOBY consumes almost all of the sugar, no need to worry about the health risks associated with eating refined sugar.
- Check the pH if you’re nervous. Kombucha generally finishes with a pH of 2.5.
- Anything lower than 4.6 is safe to drink, since the acidity acts as a preservative. Commercially available pH strips can be used to verify that your brew is ready.
- Use unflavored organic tea. Oils from flavored teas can be damaging to your SCOBY.
- Watch for mold and throw away a batch that gets moldy.
Kombucha Brewing Don'ts:
- NEVER ferment your kombucha in a metal, plastic, or ceramic container. Finished kombucha is very acidic, and can leach toxins out of some metals, plastics, and ceramic glazes.
- Don’t use teas flavored with oils (such as Earl Grey), as these can damage your kombucha SCOBY.
- Don’t add flavorings, such as ginger or raisins, to the fermenting kombucha; they can damage the SCOBY or encourage mold. Add these when bottling the finished kombucha; the high acidity will preserve the fruit.
Do-It-Yourself Kombucha Recipe
Now that you’ve got the facts, it’s time to get your hands dirty! Here’s what you’ll need:
- A kombucha starter. This consists of a kombucha SCOBY (also called a “mother”) and ½ cup prepared kombucha tea. These can be purchased, or if you’re lucky found for free from a friend.
- ¼ cup of refined white sugar
- 1 quart water
- A glass jar or bowl larger than 1 quart
- 3 tablespoons dry unflavored organic green tea or unflavored organic black tea
- A strainer
Step One: Wash/Sanitize Your Equipment
Thoroughly wash all utensils, pots, and bowls. It’s important to minimize the yeasts, bacteria, and molds competing with your SCOBY.
Step Two: Boil Your Water
Boil the quart of water for several minutes. This has three benefits: (1) It kills any microbes that may be in the water; (2) Boiling will drive the chlorine out of treated water (chlorine can damage your SCOBY, and will almost certainly slow fermentation); (3) It is easier to dissolve sugar in hot water.
Step Three: Add Sugar and Tea
Cut the heat. Add sugar, stirring until it is completely dissolved, then add organic tea leaves. Use a T-Sac or strain the leaves out after they are infused. Let the sugar/tea solution cool until it is room temperature. If the fluid is warmer than body temperature it will kill the SCOBY.
Step Four: Add Tea Infusion to SCOBY
Meanwhile, place your SCOBY and ½ cup of prepared kombucha in the glass jar. When the sugar/tea solution has cooled, pour it into the jar with the SCOBY.
Step Five: Cover and Wait
Cover the jar with a clean piece of cloth or paper towel, secure the covering with a rubber band, and place the tea in a warm, dark place. After 5 days, begin checking the tea and taste it. As the kombucha ferments, a new “daughter” SCOBY will form on the surface of the solution; this is perfectly normal. The kombucha is ready to drink when tiny bubbles are forming at the edges of the surface of the tea, and it tastes like a mildly sweet, slightly vinegary cider. Fermentation times of 7 to 9 days are normal, and 14 days is not unusual. Keep fermenting until it tastes good to you!
Step Six: Refrigerate Finished Kombucha
Pour the kombucha into a clean glass container and refrigerate. Refrigeration halts fermentation, and also helps the kombucha mellow. Be sure to leave at least ½ cup of kombucha behind to keep your SCOBY moist and ready for your next batch. The SCOBY should be at least covered with kombucha.
Allow fresh kombucha to “rest” in the fridge for a day or two after it is finished brewing. This is a process wine brewers call “cold stabilization.” This reduces the acidic bite and allows insolubles to settle out. The result is a clearer brew with a more subtle, complex flavor.
Step Seven: Bottle Ferment for Carbonation (OPTIONAL)
A second ferment is popular to build carbonation and to flavor the tea with fruits or herbs. Pour the kombucha into a clean, sealable bottle. Add fruit, herbs or juice to your kombucha, put the cap on and let it ferment for another 5 days in a warm dark place. After 5 days, taste the kombucha to see if it’s reached your preferred carbonation level. Once it has, put it in the fridge to halt fermentation and it’s ready to drink! Experiment with different flavors and fruits - some will give you more bubbles than others! For more information on the second ferment check out the kombucha tips below.
Kombucha Tips & FAQs
Making kombucha is a fun and fizzy process! But it does come with a lot of considerations and variables. Here are a few more tips and answers to frequently asked questions on how to brew beautiful booch!
How Can I Tell If My Kombucha is Healthy?
A new SCOBY daughter has formed. A smaller, thin SCOBY will begin to form on the top layer. After 2 or 3 batches this daughter can be disposed, given to a friend or stored in the fridge. It’s also fine to let it thicken the whole mother SCOBY, but after a while you will want to make room for more tea! It doesn’t take a large SCOBY to make great kombucha. Your kombucha should have a slightly sweet and vinegar-like aroma to it, with absolutely nothing that looks like bread mold on it.
My SCOBY Sank - Is That Okay?
If your SCOBY floats, turns on its side or sinks - it’s fine. A SCOBY will go where it wants in its jar.
How Can I Tell If My SCOBY Is Moldy? What Should I Do If It Is?
If your SCOBY has mold, it will be pretty easy to tell. It tends to look a lot like bread mold, green and fuzzy. If you have mold on your SCOBY, unfortunately it is best to throw the SCOBY and the tea away. It is a sad reality, but it’s better than taking the risk of getting sick.
What’s The Best Temperature for Brewing Kombucha?
The ideal temperature range for brewing kombucha is 74 to 84 degrees Fahrenheit. While the yeast can thrive below 70 degrees, the acetobacter cannot, and undesirable microbes might take hold. Temperatures warmer than 84 degrees will kill the SCOBY. In general, low-temperature fermentation takes longer and produces a lighter brew, while high temperature fermentation goes faster and produces a darker brew with a more powerful flavor.
When Should I Retire My SCOBY?
Over a few dozen batches, your SCOBY will get old and exhausted. A ragged, dark brown SCOBY is ready to be retired (throw it away, compost it, or feed it to your dog), and replace with one of your backup “daughters.”
Can I Make Decaffeinated Kombucha?
For decaffeinated kombucha, simply use decaffeinated tea! Make sure to choose a tea that does not have flavorings or oils so as to not damage the SCOBY.
More About Second Fermentation
The second ferment is an equally delicate process, and the elusive fizz of kombucha can take some experimenting to get right. For best results, use a grolsch-style beer bottle with a super secure cap. Screw caps will work, but the less air that escapes, the better. Fruit (dried or fresh), juice and herbs can all be used to flavor during the second ferment. Certain fruits/herbs will also help with more carbonation, and can even vary batch to batch.
Typically second ferments will take about 5 days, but this can vary by personal taste, geographic location and what flavorings you have. For the first round, wait 5 days and taste your kombucha. If you are happy with the flavor and fizz, stick in the fridge and it is ready to drink, if you’d prefer more fizz and flavor, let it keep fermenting. If you leave your kombucha to ferment for a longer period of time during the second ferment, careful when uncapping. Super carbonated kombucha has been known to send caps flying!